Set Up the VF360 System
![]() For information regarding the first login, see Log into ViewFlow360.
For information regarding the first login, see Log into ViewFlow360.
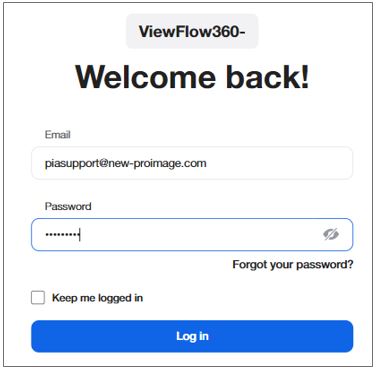
Type the VF360 URL in your browser to access the VF360 login screen.
In the Email Address field enter your email address (which is also your user name) and in the Password field enter your password.
Check the box Keep me logged in to save your login information (optional).
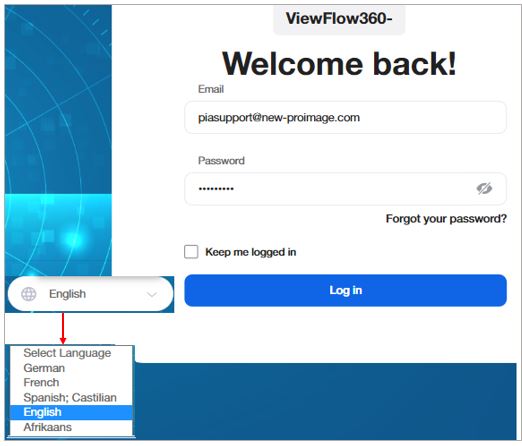
Select the language you want to use in your VF360 GUI.
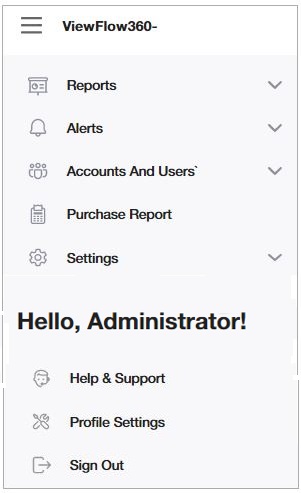
To navigate among the VF360 screens, select the ![]() Menu icon and select the view you need.
Menu icon and select the view you need.
To access the VF360 help site, select Help & Support in the menu.
Root administrator
The root administrator has all the rights in VF360, to view, set and define all the parameters.
Global user
The root administrator can define Global Users, who have partial administrator privileges. They can see all the accounts in the system and their data, and, if they have red/write permissions, they can also make changes.
There are two types of global users:
Users with read/write permission, who can see all the available information, can add or delete account users, and can make/save changes.
Users with read-only permission, who cannot see all the information in some of the screens, cannot add or delete account users, and cannot make changes (the Save button is not available).
Monitoring user
The root administrator and the global users with read/write permissions can define users as Monitoring Users. The monitoring users can have Read or Read/Write permissions and can only manage the accounts belonging to their own enterprise. The Monitoring user has the same role as a Global User, but for a restricted group of accounts.
![]() You only see the data regarding the accounts you manage.
You only see the data regarding the accounts you manage.
Organization user (the Contact Person defined for an organization)
The Organization Admin User can add the user roles, such as Organization User, Account, and Account User in the system under their respective organization.
Account user (the Contact Person defined for an account)
You can add separate accounts and for each account (company) you can add different account users by navigating ![]() > Accounts and Users > System Users > Add User > Account User.
> Accounts and Users > System Users > Add User > Account User.
![]() IMPORTANT: The users defined in the Account can only access the data of their own company.
IMPORTANT: The users defined in the Account can only access the data of their own company.
When you log into VF360, the default screen is the Dashboard, which offers a big picture of all the accounts and their essential information.
For information regarding the Reports, see Set_Up_the_VF360_System_Reports.
For information regarding the Alerts, see Set_Up_the_VF360_System_Alerts.
For information regarding the Accounts and Users, see Set_Up_the_VF360_Accounts_and_Users.
For information regarding the Settings, see Set_Up_the_VF360_System_Settings.
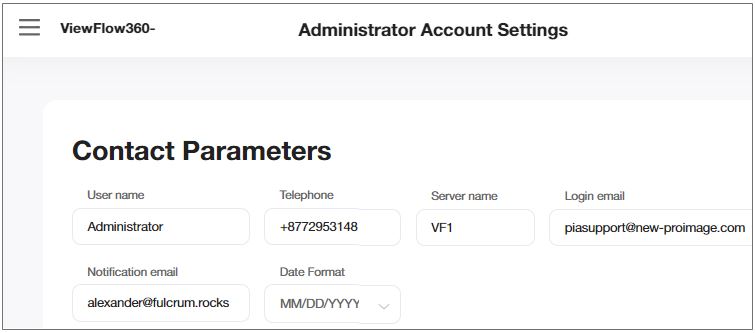
In this section you must enter the general settings of VF360, like the root administrator information, the global hot folder, the map dashboard settings and so on.
|
Field |
Description |
|---|---|
|
User Name |
The administrator’s user name. |
|
Telephone |
The administrator’s contact number. |
|
Login Email |
The email the administrator uses to log into VF360. |
|
Notification Email |
The email where the administrator receives system notifications. |
|
SERVER NAME |
Server name used for naming the purchases Reference field in Menu > Purchase Report. |
|
Date Format |
The format of the dates this user sees in the system. The options are DD/MM/YYYY and MM/DD/YYYY. |
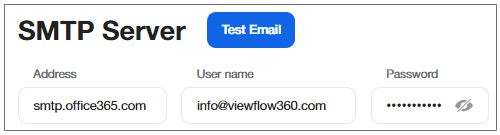
Set up the smtp.office365.com email server (the server address, the user name and the password for access).
|
Field |
Description |
|---|---|
|
Address |
The server address: smtp.office365.com |
|
User Name |
The administrator’s Office 365 Address. |
|
Password |
The administrator’s Office 365 Password. |
|
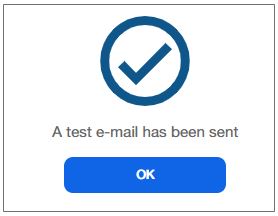
Test Email |
Select to send a test email to the Administrator’s notification email. Upon successful test mail, you can see the following message:
|
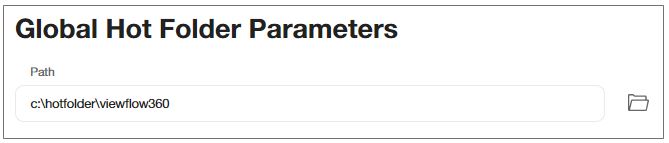
The path to the Global Hot Folder can be:
A UNC Path (in Universal Naming Convention format) if you use a network folder location. In this case the access to the folder is performed with user name and password for any Windows user who has sufficient permissions to read from/write to this location.
A path to a folder on an FTP server. In this case you must use the format ftp://ftpservername.com/foldername. The connection to the FTP server can be tested by selecting the folder icon next to the path. If the path, the user name and password are correct, the content of the FTP folder opens in a new browser tab.
|
Field |
Description |
|---|---|
|
Path |
The unique input folder where VF360 expects the files from all the Coretex systems of all the accounts. |
|
User Name |
The user name for reading from the global hot folder. |
|
Password |
The password of the user represented by the User Name. |
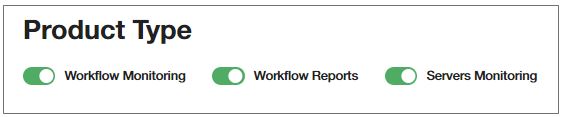
Set the product type, as appropriate. Product type is applicable only to the System Administrator and Account.
|
Field |
Description |
|---|---|
|
WORKFLOW MONITORING |
Default state - ON . In case Toggle is turned OFF, the Workflow monitoring is disabled in the system for Organization Users, and Accounts. |
|
WORKFLOW REPORTS |
Default state - ON . In case Toggle is turned OFF, the Workflow reporting is disabled in the system for Organization Users, and Accounts. |
|
SERVERS MONITORING |
Default state - ON . In case Toggle is turned OFF, the Servers monitoring is disabled for the system for all users. |
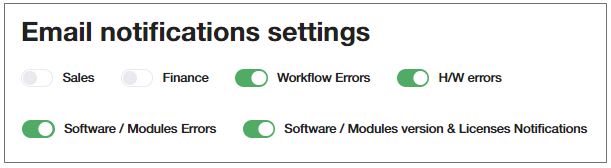
Set the notifications you want the root administrator to receive at the Notification email you set for them in the Contact Parameters earlier in this window.
|
Field |
Description |
|---|---|
|
SALES |
|
|
FINANCE |
|
|
WORKFLOW ERRORS |
See details in the Alerts Dashboard. |
|
H/W ErrorS |
See details in the Alerts Dashboard. |
|
SOFTWARE/MODULES ERRORS |
See details in the Alerts Dashboard. |
|
SOFTWARE/MODULES VERSION & LICENSES NOTIFICATIONS |
|
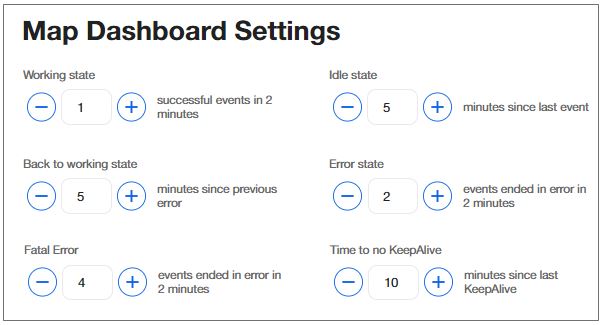
Each account (Coretex system) has a status representation on the Map Dashboard. Their status can be Working, Idle, Error, Fatal Error, and so on. In this section you must set the criteria according to which a Coretex system is in one state or another.
For example, if you select 15 in the Fatal Error field, it means that after 15 processes events ending in error in less than two minutes, the Coretex system in that location receives the status Fatal Error.
You can define, for example, that Coretex is in working state if it has processed at least eight events in two minutes, and in Idle State if it does not process anything for 3 minutes.
![]() The settings apply to all the accounts.
The settings apply to all the accounts.
|
Field |
Description |
|---|---|
|
Working State |
The number of successful events processed in two minutes which show that the Coretex account (tenant) is in working state. For example, if Coretex processes at least 10 events in two minutes, its status is Working. |
|
Idle State |
The time interval since the last processed event [minutes] which defines that the Coretex account (tenant) is in an Idle state. For example, if Coretex does not process any event for three minutes, its status is Idle. |
|
Back to Working State |
The time interval passed since the previous processing error [minutes]. For example, if three minutes have passed since the last error, the Coretex account is back to Working state. |
|
Error State |
If the processing of this number of events ended in error in a two-minute interval, the Coretex account (tenant) is in Error state. |
|
Fatal Error |
The number of events whose processing ended in error in a two-minute interval, which causes the Coretex account (tenant) to be labeled as Account in Constant Error. |
|
TIME TO NO KEEPALIVE |
The number of minutes that should pass since the last parsed XML with ‘Monitor’ flow step, so that the ‘No keep alive’ alert for Workflow state can be triggered. |
![]() The two-minute interval is fixed and cannot be configured.
The two-minute interval is fixed and cannot be configured.
Set the time intervals for server monitoring with the installed Monitoring Agent.

|
Field |
Description |
|---|---|
|
SCANNING INTERVAL (min) |
The number of successful events processed in two minutes which show that the Coretex account (tenant) is in working state. For example, if Coretex processes at least 10 events in two minutes, its status is Working. |
|
OK STATUS TIME (%) |
The time interval since the last processed event [minutes] which defines that the Coretex account (tenant) is in an Idle state. For example, if Coretex does not process any event for three minutes, its status is Idle. |
|
H/W KEEPALIVE INTERVAL (min) |
The time interval passed since the previous processing error [minutes]. For example, if three minutes have passed since the last error, the Coretex account is back to Working state. |
|
H/W NO KEEPALIVE TIME (min) |
If the processing of this number of events ended in error in a two-minute interval, the Coretex account (tenant) is in Error state. |
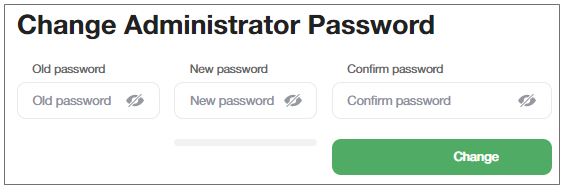
To change the password of the administrator’s account, enter the old password, the new password in the New password and Confirm password fields and select Change.
![]() To view/hide the password as you type it, select the
To view/hide the password as you type it, select the ![]() icon.
icon.