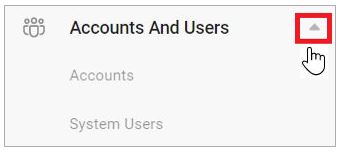
The VF360 ACCOUNTS
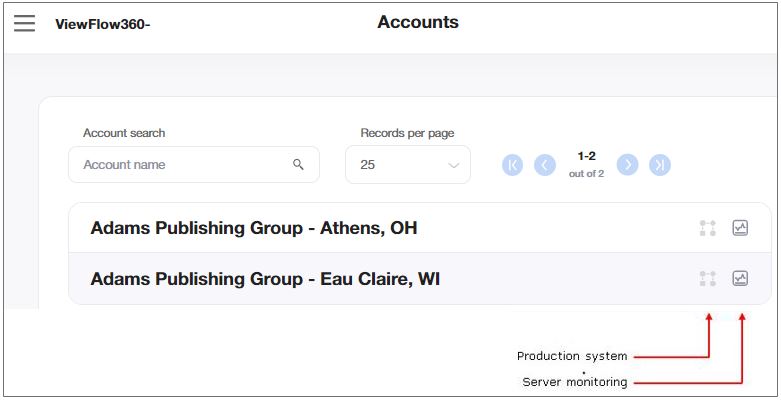
Use the Accounts view to see and manage the accounts you have permission to access.
Select in the drop-down list in the Records per Page field, the number of table rows you want to display on the screen at a time. To browse through the pages, use the ![]()
![]() buttons.
buttons.
Use the dynamic Account search to limit the display to specific accounts.
In the Accounts view you can add new accounts, or you can find information regarding the existing ones:
![]() For Cloud accounts only.
For Cloud accounts only.
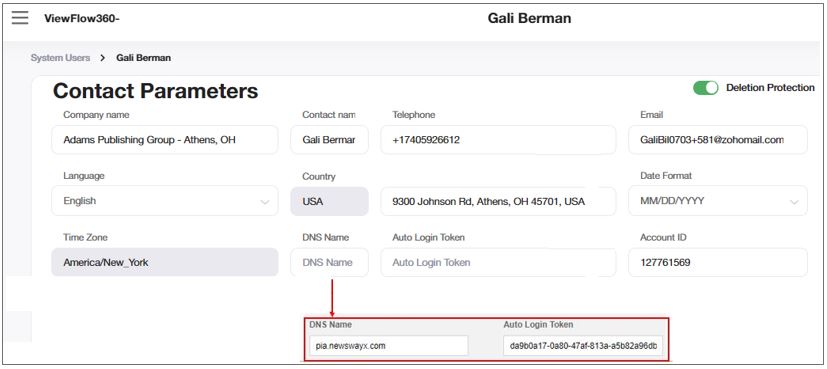
Use the Production System feature to navigate from VF360 straight to the Coretex system, without having to enter your user credentials.
In Coretex, each account is represented by a folder, which VF360 monitors. On the account side, you can define a generic software user (not a real user) for the purpose of connecting from VF360 straight to Coretex. This user must have a password in NewsWayX. For this user you need to generate an API token, which allows the users belonging to that specific account to connect to Coretex without having to introduce their own user credentials.
In Coretex, in Control Panel > Profiles > Users, select Generate Token. The token automatically appears in the API Token column.

To use this feature, you must first define the DNS of the cloud where Coretex runs, in VF360, ![]() > Accounts and Users > Accounts >
> Accounts and Users > Accounts > ![]() Edit Accounts > Contact Parameters > URL.
Edit Accounts > Contact Parameters > URL.
You must also enter the API token in Menu > Accounts and Users > Accounts > ![]() Edit Accounts > Contact Parameters > Auto Login Token.
Edit Accounts > Contact Parameters > Auto Login Token.
Select the ![]() icon to navigate to the monitored software (test.pinwx.net/coretex/html/newsway/# in the example).
icon to navigate to the monitored software (test.pinwx.net/coretex/html/newsway/# in the example).
![]()
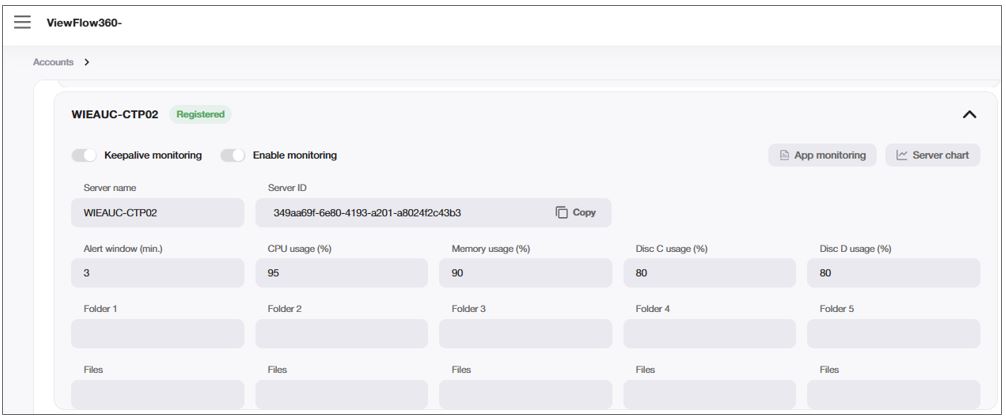
Use the Server Monitoring to view the server registration details and as well to view the servers available for the existing accounts.
![]() Monitoring Users can only view the details and the fields are grayed out in this Server Monitoring screen.
Monitoring Users can only view the details and the fields are grayed out in this Server Monitoring screen.
As an engineer working with NewsWayX servers monitoring on the Amazon servers, you may want to receive timely alerts on the apps that are down on your server and to react quicker to the problems. This may be due to the app unavailability that causes on your premises. A new function "App Monitoring" added to the server monitoring functionality helps you fixing the issues/errors.
The error is reported when the app is “down” for a specified in the account’s server monitoring page Alert window (min.) during the scanning (scanning interval is set in Admin Profile Settings)
App constitutes as “down” when it is not responding, not available, shut down or any state other than “app is working normally” state
If at least one instance of the app is running, the app must be considered working correctly
If the agent is in maintenance mode, the user must not get app error notifications.
The error is to be considered in “recovery” status when the app is back to life for a specified in the Root Admin Server Parameters OK status time (%) timeframe
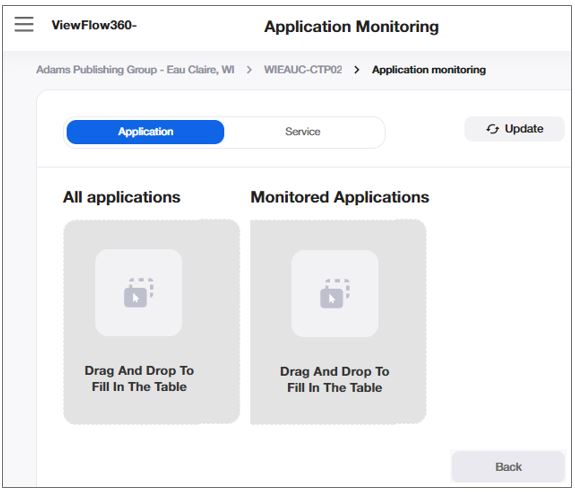
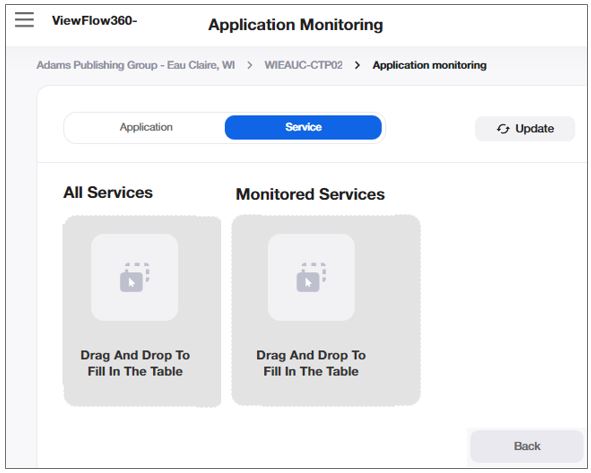
By clicking App Monitoring, the Application Monitoring page is displayed. This reads all the applications and services installed on the server where the “Monitoring Agent” is installed.
![]() The Application Monitoring screen is read-only for the Monitoring User and the user cannot add or modify anything in this screen.
The Application Monitoring screen is read-only for the Monitoring User and the user cannot add or modify anything in this screen.
Use the System Users view to see all the users registered in the system, their details concentrated on one page, and review their latest activity in the system.
Select in the drop-down list in the Records per Page field, the number of table rows you want to display on the screen at a time. To browse through the pages, use the ![]()
![]() buttons.
buttons.
Limit the display to one or more items by using the search icon, where available.

|
Field |
Description |
|---|---|
|
USER Name |
The user’s name, as it appears in the User Account:
|
|
|
The user’s email, as it appears in the User Account, in the Email field. |
|
USER TYPE |
The user's role in the system:
|
|
ORGANIZATION |
This value is filled in for Monitoring Users only. The field is empty for all the other users. The displayed value is the one in the Enterprise Name field, in the Monitoring User Account. |
|
ACCOUNT |
This value is filled in for Account and View Users only. The field is empty for all the other users. The displayed value is the one in the Company name field, in the Account (for View-only User, it is retrieved from the related Account). |
|
PERMISSION |
The user's permission, as set by the root administrator in the Permission field in the Account Parameters. Can be R (read - view only the data in the system) or RW (read/write - view and edit the data in the system). |
|
LAST LOGIN DATE |
The last date when the user logged into the system. The date format is the one set in the Account Parameters for this user. |
|
LAST LOGIN TIME |
The last time when each user has logged in to the system. Time is displayed in UTC 0. |